Virtual Private Network (VPN) is a software that offers enhanced security by hiding your personal information like your own IP Address, location, and other critical information. A VPN can upgrade your protection and security by foiling your usage being visible to your ISP or other data tracing and collection agencies. Setting up a VPN is easy and every user can do it independently as it doesn’t require much of tweaking. You just need to download, install and configure it with a user name and password to hide your credentials and fake them with another one. You may need to use different VPN service providers depending on the availability of variants for different platforms. Here are quick steps that you can perform on different platforms.
Benefits of the Best VPN
There are several benefits of using a VPN client. Here is what the best VPN service can do for you.
- Prevent attacks by hacking, spying agencies to steal your information.
- Encrypts your data to go through a 256-Bit military grade proxy tunnel.
- Bypass ISP throttling and connect through 1500 plus servers for uninterrupted connectivity.
- Stream HD Quality content with blazing-fast speed on your favorite streaming web portals.
- A VPN service hides your IP address, location and other critical information from spying apps.
- Avail location-based deals and offers by switching your IP and connecting to country-specific servers.
- Prevent your online tracking activity by network administrators, officials, or cyber-criminals.
- It lets you use internet services anonymously by replacing your real IP address and location.
- Get unlimited bandwidth by boycotting the limit set by your ISP.
Setup VPN on Windows
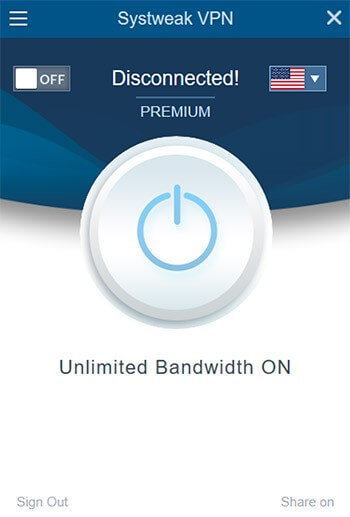
There are numerous VPN services available for Windows. We have tested, reviewed and compared top VPN services and here is the best VPN service that you can use on a Windows-based platform.
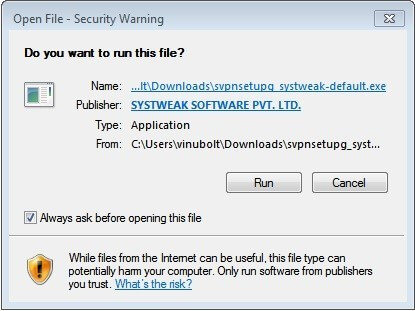
Step 1. Download Systweak VPN for Windows from its authorized site.
Step2. Initiate the installation process and follow the on-screen instruction.
Step 3. If you are a new user, sign up for the Systweak server account.
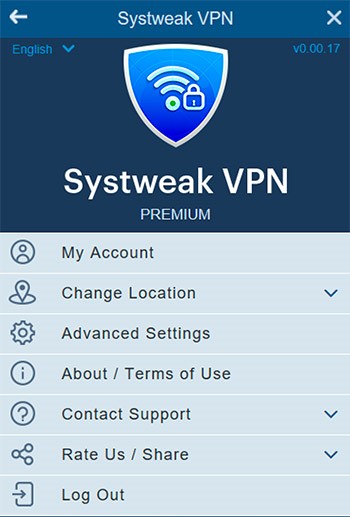
Step4. Activate your account and select a plan (monthly or yearly) as per your requirement.
Step 5. Select the country-specific server to connect from the drop-down list.
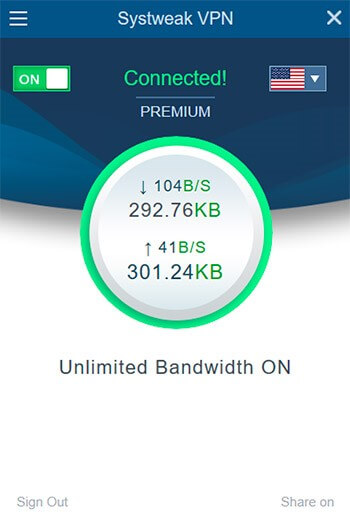
Step6. Turn on to enable the Systweak VPN server by using the on/off options available.
Step 7. Start browsing secured, private, and unlimited data service.
Setup VPN on Android
If you connect to hotspots or keep open network connectivity, don’t feel your smartphone secured without a VPN. Out of all the available VPN clients for Android, SuperVPN is one of the greatest VPNs available for Android. It has got over 100 million happy customers with 4.7 user rating. The app size is just 9.1MB that doesn’t use much of your system resources. Here is how you can download and install a VPN client on your Android device.
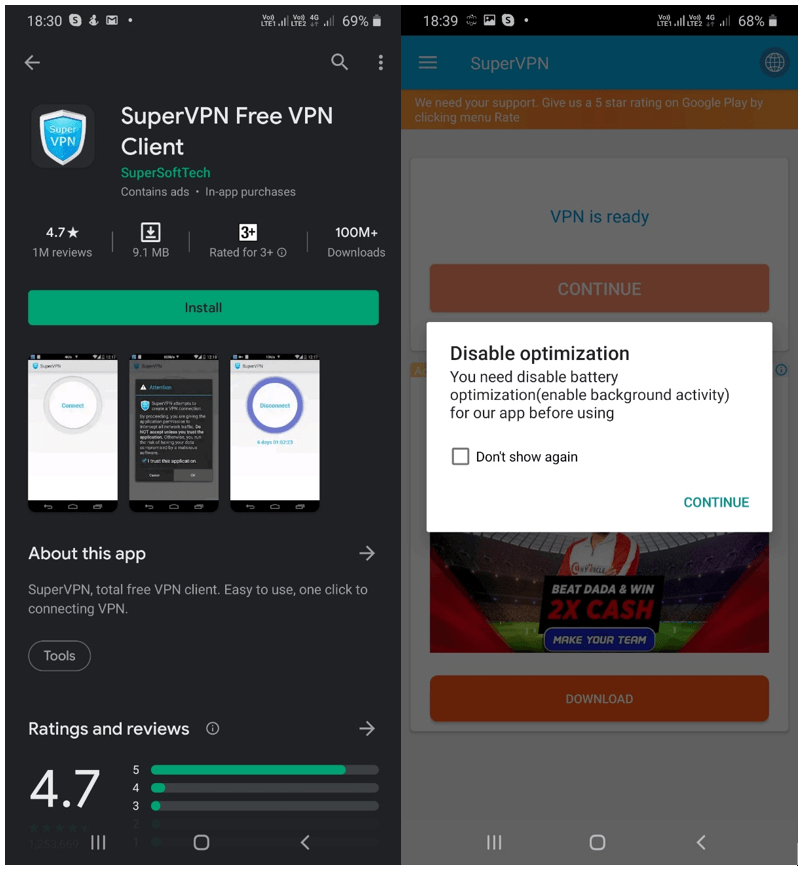
Step 1. Go to Google Play Store and search for SuperVPN.
Step2. Tap and install the SuperVPN.
Step 3. Open the security platform once the installation is complete.
Step4. It will ask for authorization to continue and allow a connection request.
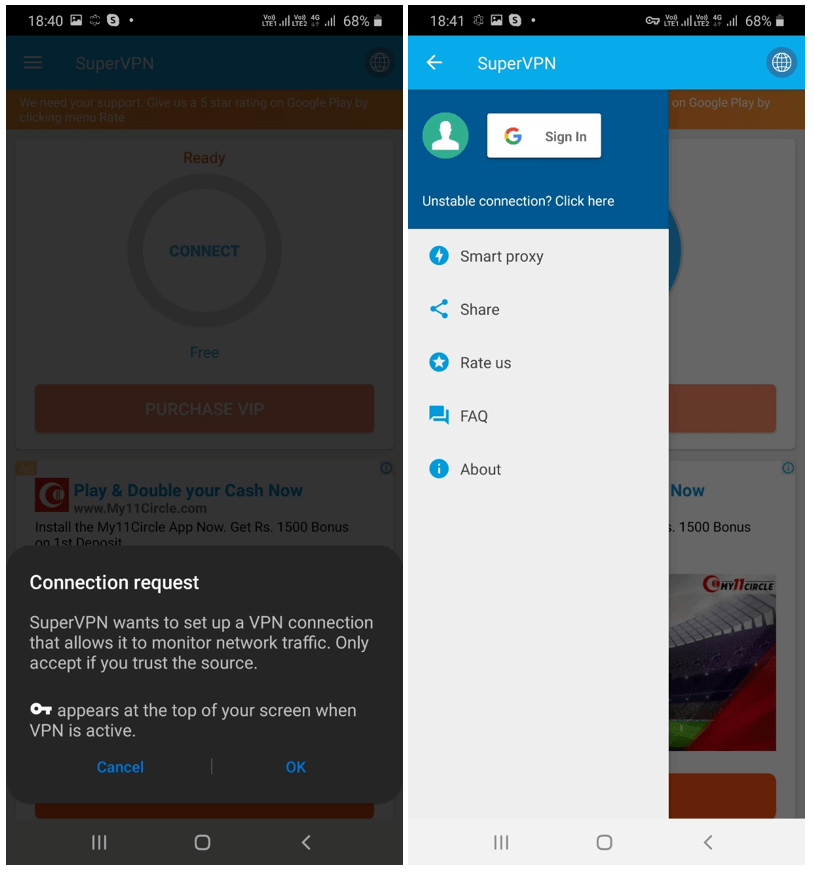
Step 5. Tap on the free connection and tap on ‘Connect’ to get started. You may need to get into device settings and go to Wi-Fi & Internet or Wireless & networks to explore more settings for the VPN. You may need to choose between VPN protocols, that may include PPTP, L2TP/IPSec, and others. You must have a VPN using the credentials like server name, your user credentials.
“Please Note: If you want to explore advanced features and unlimited browsing through Ad-free connection, go for the premium services.”
Setup VPN on iOS
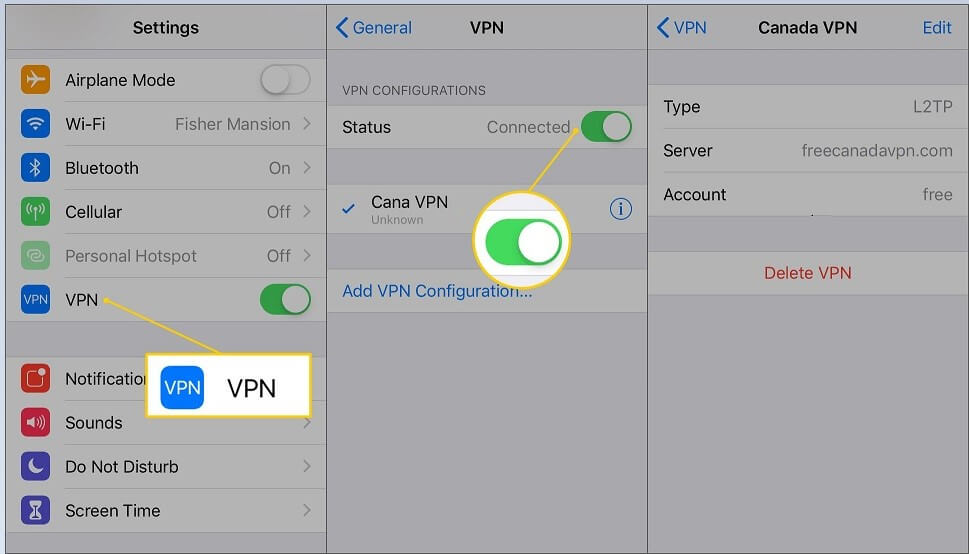
Setting up a VPN on iOS is as easy as setting it up on an Android device. Here are the steps that need to be followed to set up a VPN connection on an iOS device.
Step 1. Go to the ‘Settings’ section of your iPhone or iPad.
Step2. Tap on the ‘General’ option followed by the ‘VPN’ option.
Step 3. Tap on ‘Add VPN Configuration’ to explore open VPN connections.
Step4. Enter the information provided by your network administrator including the VPN protocol, the VPN settings like your remote ID, server and the login credentials.
Step 5. Tap on ‘Done’ once completed, to save your profile settings.
Step6. Toggle ON or OFF on the VPN settings page to enable or disable the VPN connection.
Setup a VPN on Chrome OS
Google’s Chrome OS has made it really simple to set up a VPN on this platform. There are limited options available but these options will really work for you as a life savour.
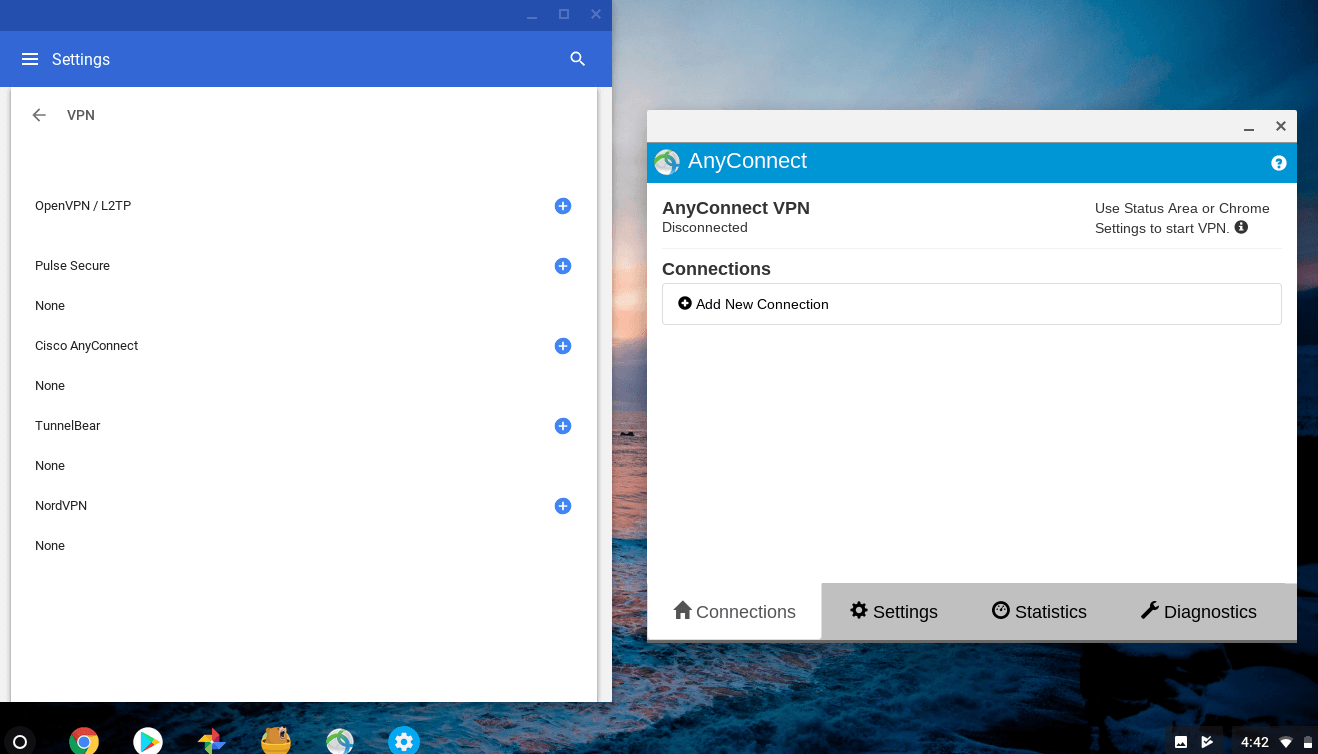
Step 1. Go to your account photo at the bottom-right corner of the screen.
Step2. Go to the ‘Settings’ option and select ‘Add connection’ option in the Network section.
Step 3. Tap on the ‘Add OpenVPN/L2TP’ option on the next page.
Step4. Enter the setup information required and click on the ‘Connect’ option.
Final Words
If you are trying to set up a VPN on Chrome OS or trying to configure VPN settings on any other device. This article must have helped you. Setting up VPN connections doesn’t take much of your time if you know the basics of downloads and installations. If your VPN is not hiding location, you can configure the settings as per your requirements and avail all the services that are freely available. If you are a regular and frequent user of hotspot / VPN connections, it is advisable to get a proper paid setup configured on your workstation or use the Proxy Package Finder. Stay secure, stay protected!

