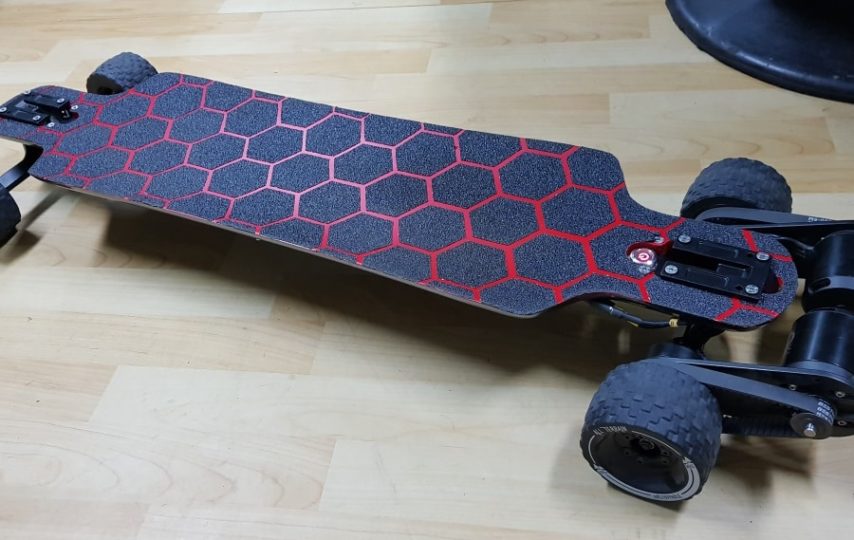
Electric skateboards are very popular nowadays since they give the joy of board sports but with much less physical effort. Electric skateboards can also be used as a substitute for motorcycles and cars in rush hour traffic, reducing your carbon footprint. Electric skateboard is much more comfortable than a normal skateboard.
Electric longboards are advantageous because they can reach speeds of up to 30 km/h. They give you the opportunity to discover cities and landscapes in a much easier way than by car or motorbike, which requires much more time to reach your destination. The cruising speed may vary according to the model you choose, but most electric skateboards can reach a cruising speed of 25 km/h.
Electric longboards are better for your health than cars and motorcycles because they don’t have any emissions into the environment. Since you’re standing up while riding them, it’s more comfortable and good for your posture too. It’s much better to have a standing position while riding than sitting, as it reduces the vibrations that are caused by uneven surfaces.
Electric skateboards are fun. They come in all sorts of designs and colours, shapes and sizes; you can find one that is perfect for your own style. You can even customise them yourself! Electric skateboard parts
Longboarding on electric boards enables you to go anywhere anytime. You just need to push the button on the remote control and you will be able to cruise through crowded or quiet streets. Electric skate boards are comfortable. It enhances your health since it helps you reduce long hours of sitting down in a car, bus, train or plane. It also reduces the number of cars on the road because electric skate boards make commuting fun!
You can convert your old skateboard into one! It will be hard work but it might be worth it.
Things you need:
– old skateboard
– a motorized skateboard kit
– screwdriver
– drill with 4mm and 6mm drill bits
– multi tool
– couple of flat screwdrivers
– soldering iron
– multi meter (optional)
– toggle switch, keyring and large heat shrink tube or an led and button (the toggle is the easiest option).
This is how you start with a normal skateboard.
1. Remove the trucks with a flat screwdriver. It’s not entirely necessary but it will make life easier later on.
2. Unscrew the front truck by turning the screws counter clockwise (not able to show that in this picture).
3. Strip down your skateboard, remove all the parts you won’t need (all the bushings and bearings and bolts) and put them in a pile.
4. Drill two holes through your deck where you want the wheel to be. Make sure what size motorized longboard wheelbase you want so here is how you work it out: take the distance between your trucks, add 2cm and divide by 2. That is the size of your wheelbase (in cm).
5. If you are making a toggle switch key ring like, drill two holes in your deck for each side where you want your button or led to be.
6. Now it’s time to drill the holes for your motor bolts. When you measure these, consider that your deck is thinner in the middle (towards the trucks) than at the front and back (for example 1mm thicker in the center). Measure your center thickness so when you put on your nuts they are not too tight or too lose.
7. If you are using a toggle switch like me, solder your wires now to your button or led.
8. Put your switch or button in the holes you drilled and use some hot glue for stability, then solder the wires to it.
9. If you are using an led like me, solder the negative (black) wire to one side of the led, then solder a wire to the other side of it and without cutting it in half (so you have two wires on one end) solder both ends together. It should look like this:
10. On the end of your second wire attach your soldering iron with some heat shrink tube or electrical tape. This will make attaching and detaching the wire from your led easier. Now solder this to another wire and put another piece of heat shrink tube or electrical tape on it to make a good connection.
11. Solder your wires to their corresponding places on the motor controller box (positive and negative, usually red and black).
12. Apply some heatshrink tubing to any exposed wire. You can also use electrical tape for this step but it is not as good looking.
13. Now twist all the wires together to reduce the chance of them shorting out.
14. Screw your trucks back on, put your wheels and screw in your hardware. Bolt everything else like riser pads or risers and bearings and bushings.


